There are two ways of deploying XDID to your website.
Each have its own advantages, but using Google Tag Manager will give you the easiest and fastest implementation. if you want absolut and full control you can use Manual JavaScript. Click the preferred installation method.
Google Tag Manager
Websites using Google Tag Manager (GTM) can deploy XDID by following these step-by-step instructions.
In this guide, we will show you how to:
- Implement the XDID Tag
- Adding Templates for easy use
- Adding Webhooks and link manipulation
We assume that you’ve already created a GTM account, created a website container in GTM, and added the GTM container snippet to your website as required: https://support.google.com/tagmanager/answer/6103696
While XDID GTM Templates has been submitted to https://tagmanager.google.com/gallery quite a while ago, the review process is dragging out due to the high amount of submissions in general. therefore, we have made it easy for you to download and install the templates directly from the github.com source where Google gets the templates.
You simply download the template.tpl file from each repository here https://github.com/xdid-net/ and import them under Templates in GTM
Implementing the XDID Tag
First, we need to setup some required variables and triggers for the XDID to work.
Creating the trigger.
The trigger is an event-based trigger which won’t fire until the XDID is set. This makes it possible to set Google Analytics, Facebook Pixel etc. using custom ID’s for Audience, re-marketing and conversion tracking.
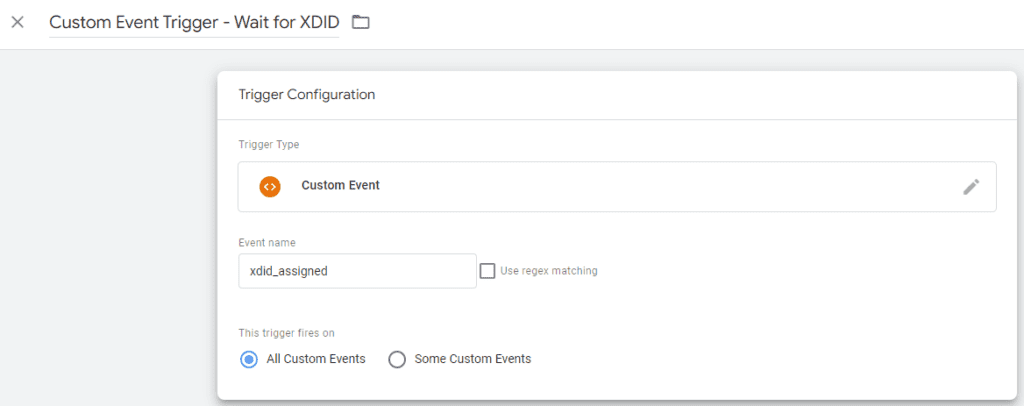
Create the trigger by pressing the new button in the trigger menu and follow the steps in the below image.
You can name the Event whatever you want. In this guide we name it Custom Event Trigger – Wait for XDID
Set the event name to: xdid_assigned and choose All Custom Events
The xdid_assigned event is fired by XDID automatically.
Now we need to set up two variables from the Variables menu in GTM.
The first is a constant for your XDID license. This is just to make it easier to reference it later and only to make changes in one place in the future.
The second variable is a DataLayer variable which pulls xdid data when the DL is loaded.
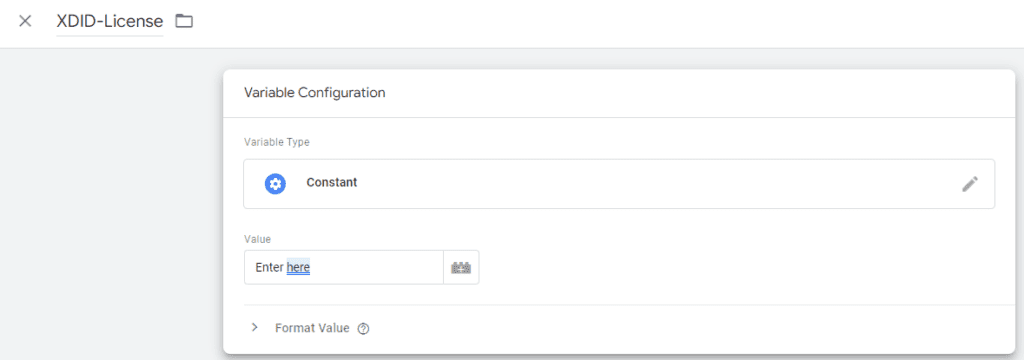
Creating the constant License variable
Again you can name it what ever you want but here we chose XDID-License.
The variable type should be Constant. in the Value you paste your License key from xdid.net (if you dont have one yet signup for a free trial)
Creating the DataLayer variable
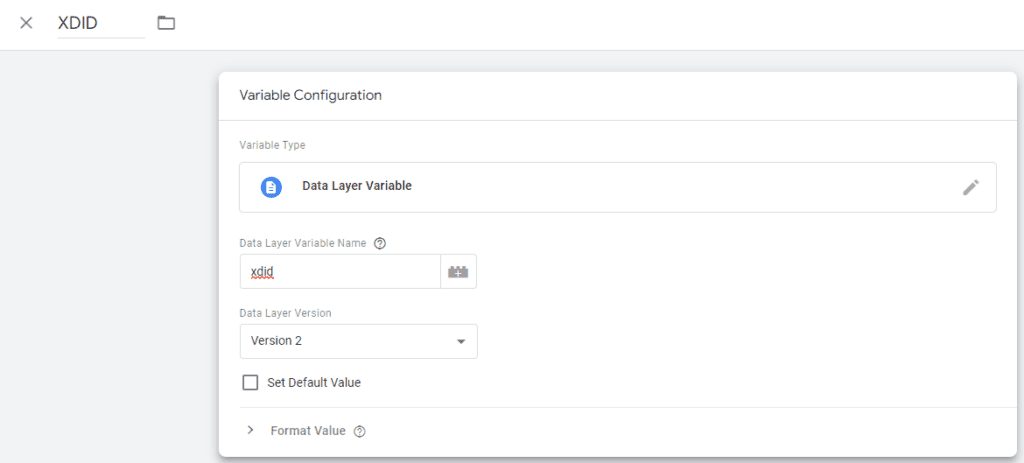
We name the variable XDID for easy reference.
Choose Data Layer Variable as the variable type and set the Data Layer Variable name to xdid (this is important).
Leave the rest as default.
Create the XDID tag
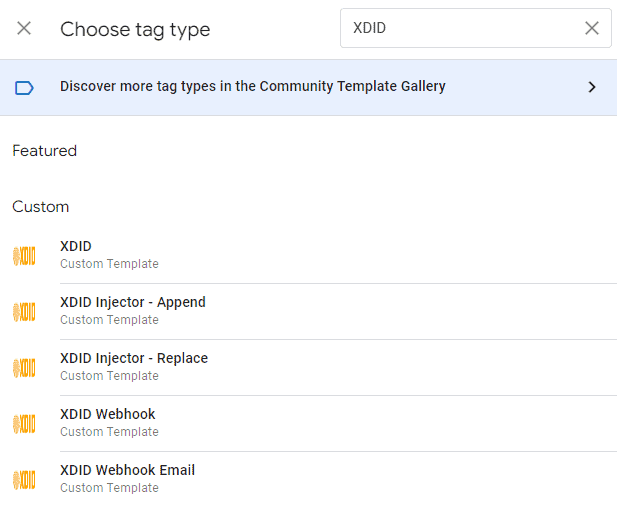
Obtain the XDID Tag from the Google Tag Manager Gallery. The easiest way to get started is to click the “New” button on the Tags page as shown below.

Search for XDID and choose the XDID Tag name
After you added the XDID Template you can continue to set it up like below
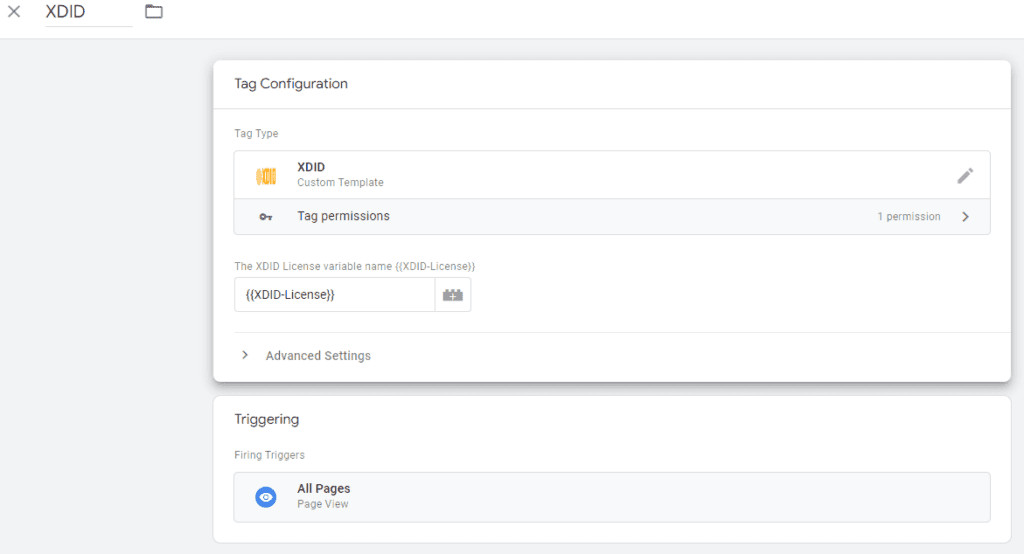
Thats it. you are ready to go.
Now if you want to do even more with XDID you have that option as well.
There are other templates in the Gallery. Just search for XDID and you will find
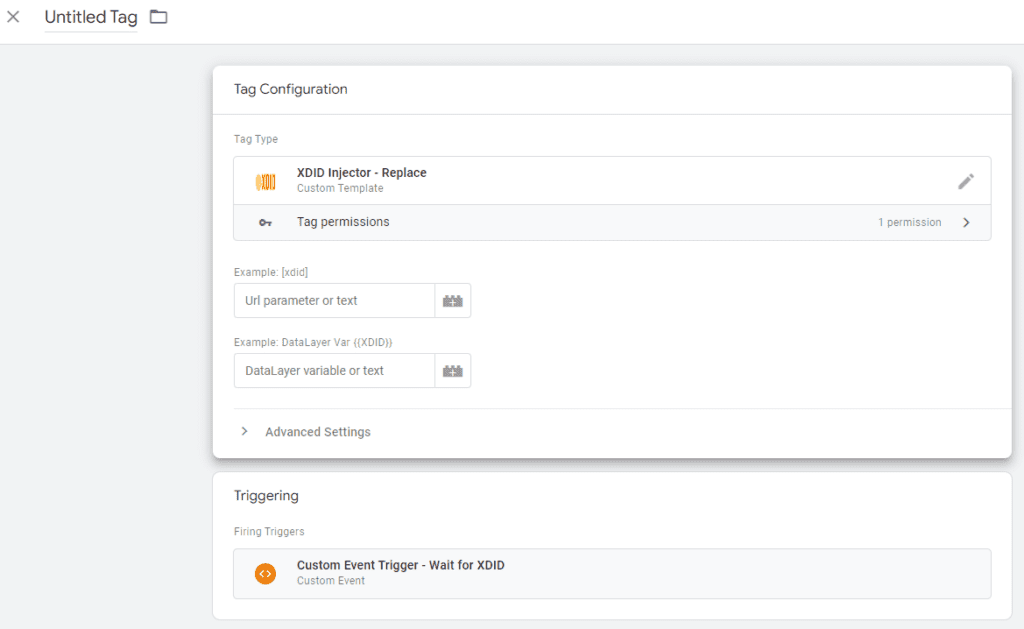
XDID Link Injector – Replace
This will allow you to replace links on your entire website with fx. the XDID. This is useful for outgoing links, like affiliate tracking, conversion tracking etc.
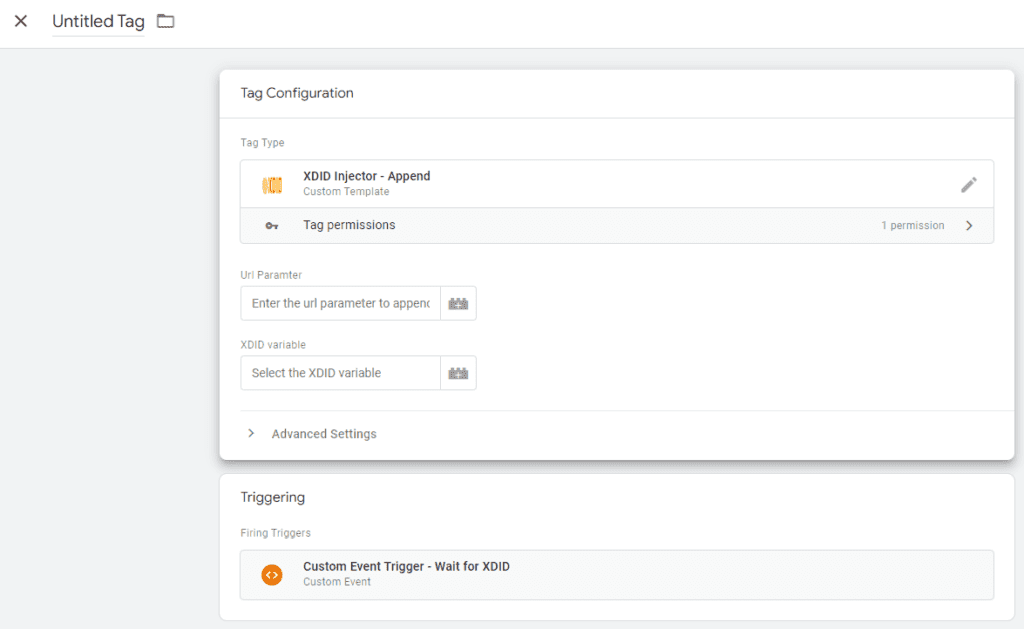
XDID Link Injector – Append
Using the Append template you can append a url parameter to all links on your website. This is useful for outgoing links, like affiliate tracking, conversion tracking etc.
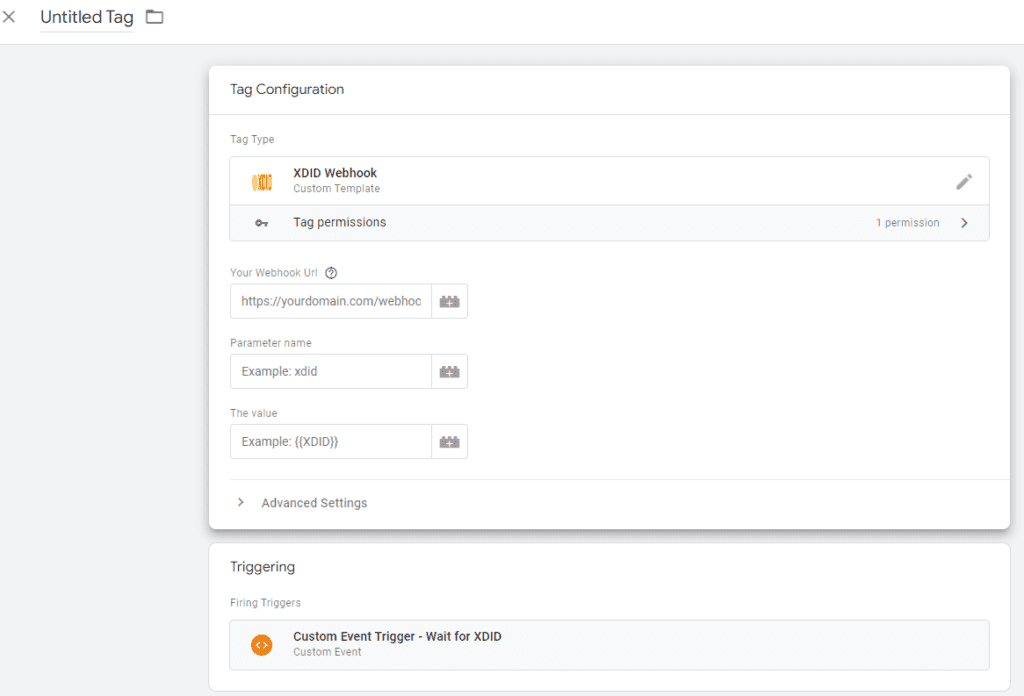
XDID Webhook
Webhooks can be used to send the XDID data to external websites for data collection. Use this to bind the users interests with your products.
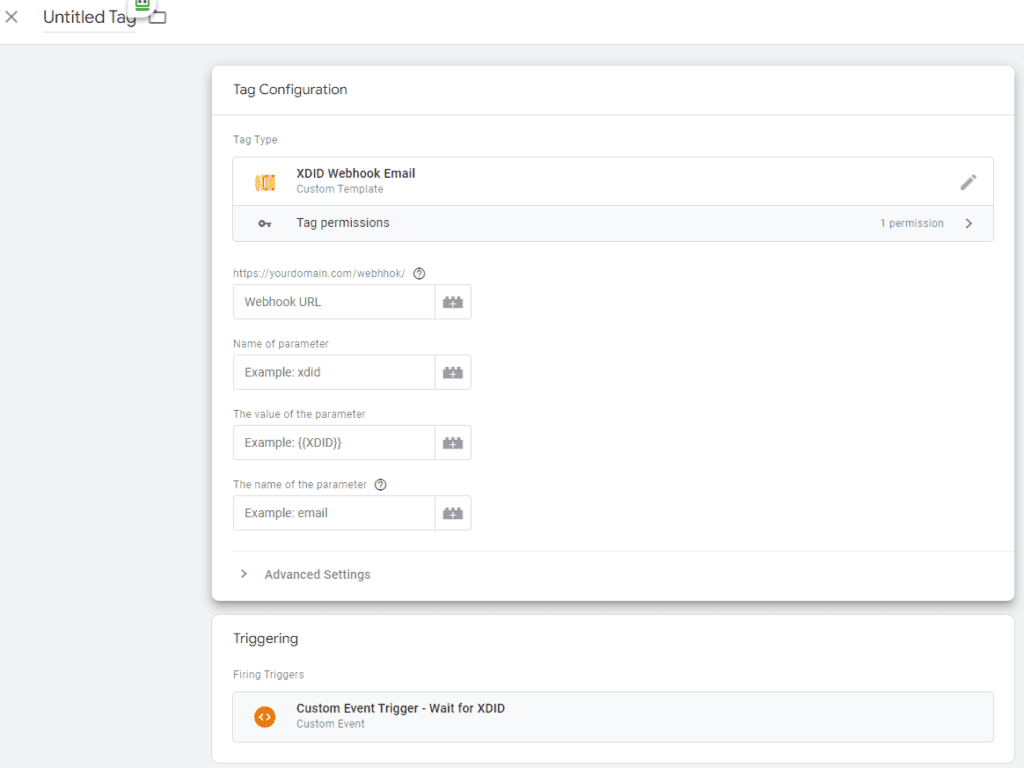
XDID Webhook Email
This webhook will send a message with the XDID and the entered email on your website. You can use this to make product recommendations in your email marketing.
Webhook Statistics
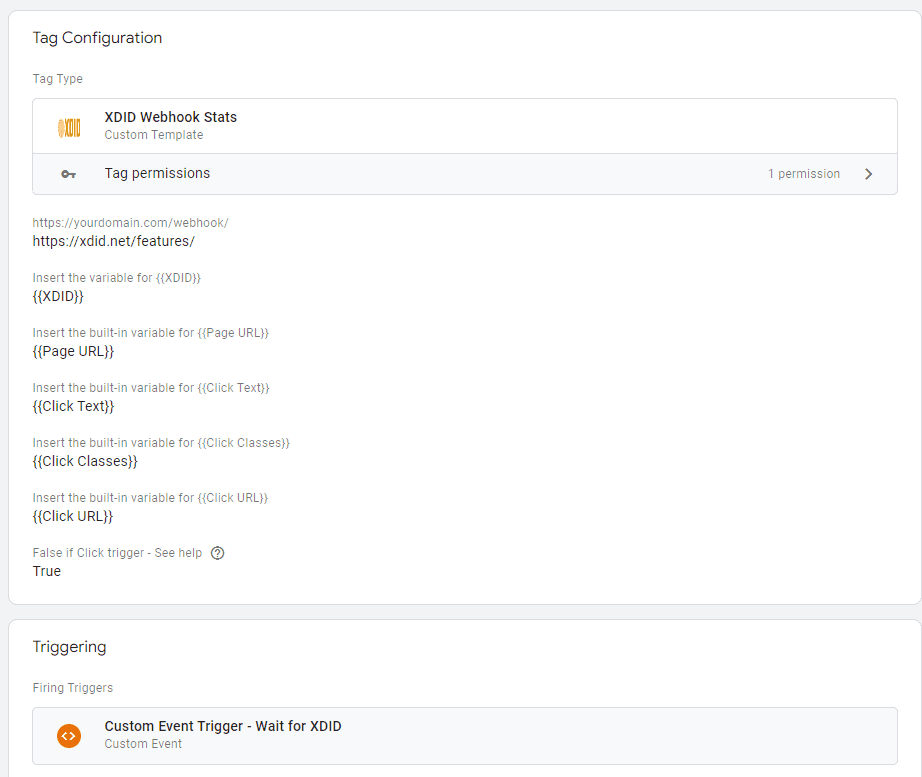
You can use the XDID to send statistics via a Webhook to your server to build recommendations for both welcoming back users as well as Search and normal product recommendations. This is easily done using the XDID Webhook Stats Template.
To make this work you need to configure a Click Trigger described below

After you added the Click trigger you need to enable the built-in variables for elements.
Under the Variables menu click the New button and select like below image
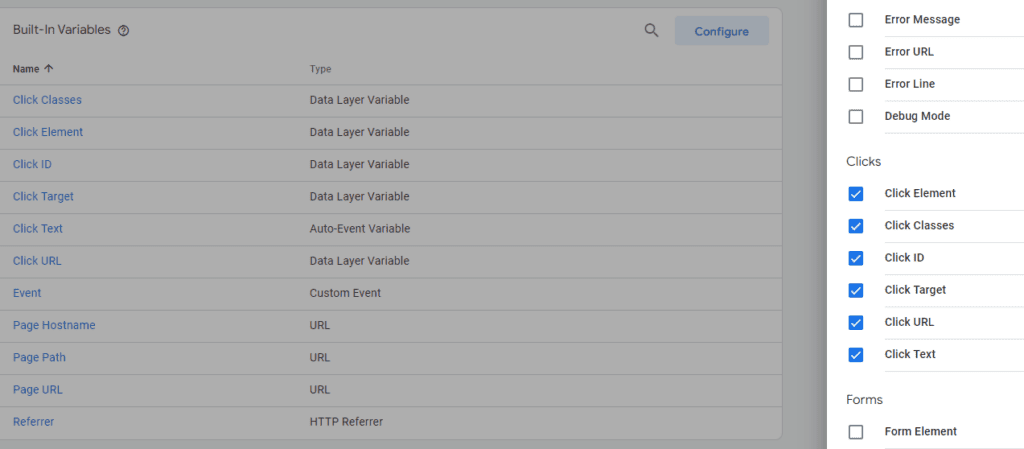
Now you are ready to enable the XDID Webhook Stats template to easily send information about the users behavior to your own server.
Note:
When using the Webhook stats please beware that if you want data for the Click Text, Click Url and Click Classes then you must set the Async to false. This will force the Webhook to finish before the page changes. This can have a performance impact if your stats server is slow, but if kept around 100 ms, the user will never notice.
This applies only to the Click Trigger
If you use the Wait for XDID Trigger, then you should use Async = true, with the tradeoff of the missing data.
Use this mode if the url contains the data needed to determine which product or url/category a user viewed.
JavaScript
If you wish to have full control all you have to do is to insert this piece of code in your code.
Remember to make sure that Analytics, Facebook pixel etc. loads after you set the XDID, else you won’t have the benefits from that.
if you only need it as an id for your own application, and using no dependencies, this is the way to go.
Remember to replace YOURLICENSE with your actual XDID license key
<script>
(function(s,r,t){r = false;s = document.createElement('script');s.type = 'text/javascript';
s.src = 'https://xdid-balancer.net/js/xdid.js';s.onload = s.onreadystatechange = function() {
if ( !r && (!this.readyState || this.readyState == 'complete') )
{r = true;var x = new xdid();x.init('YOURLICENSE',window.location.hostname,true,true);
x.run();}};t = document.getElementsByTagName('script')[0];t.parentNode.insertBefore(s, t);})();
</script>
Make sure you place a hidden field names xdid_value on your page. This is where we store the value when using the VanillaJS option
It should look something like this
<input type="hidden" id="xdid" name="xdid"/>